Latest Posts

white bean salad recipe

Holiday White Bean Salad

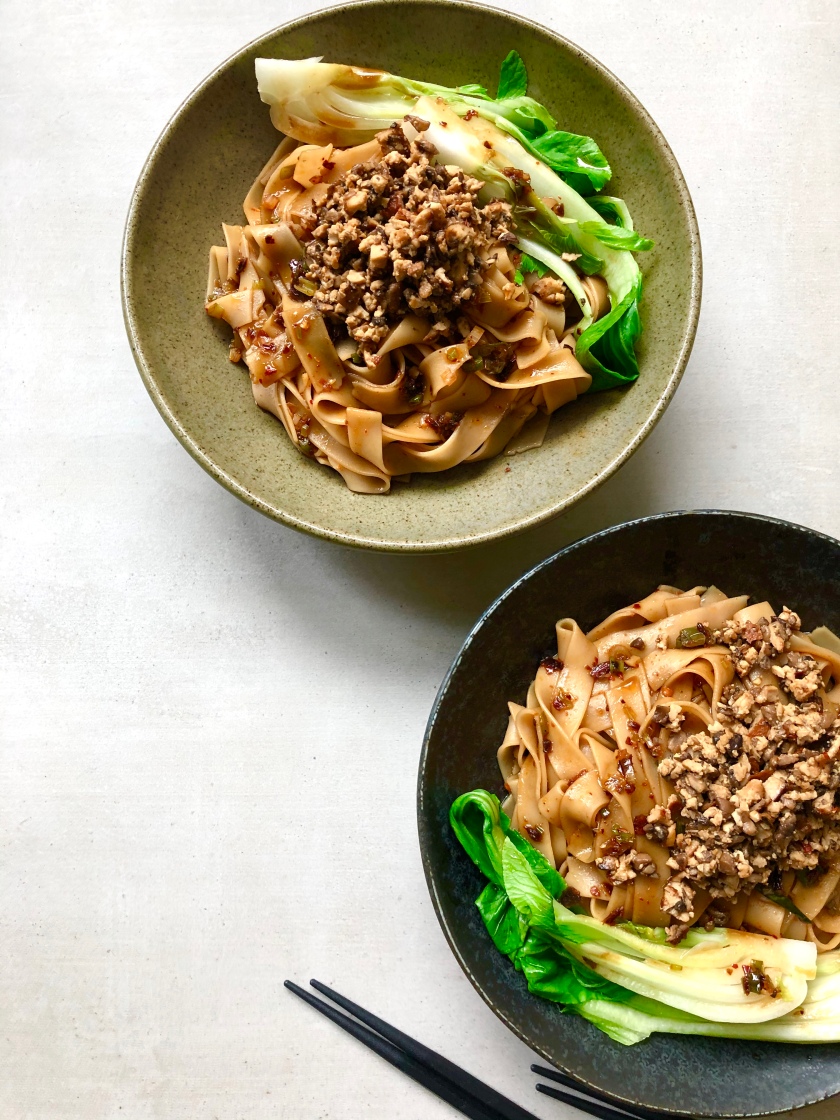
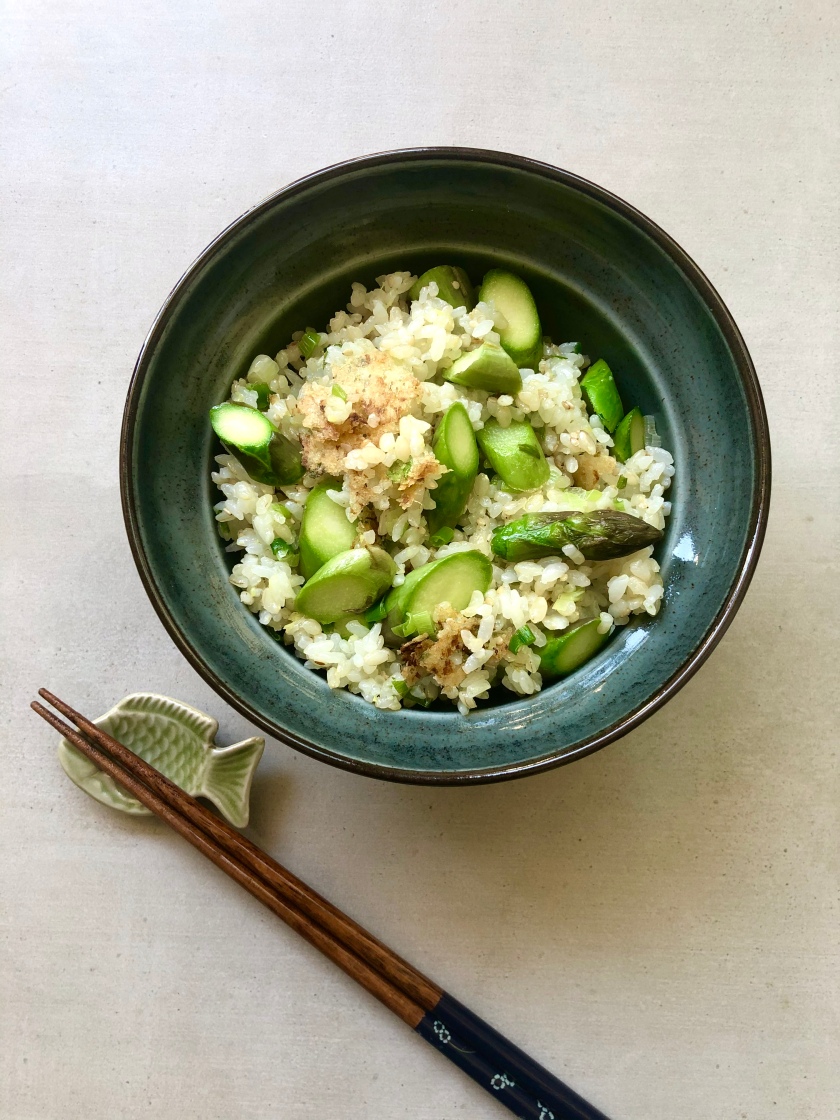
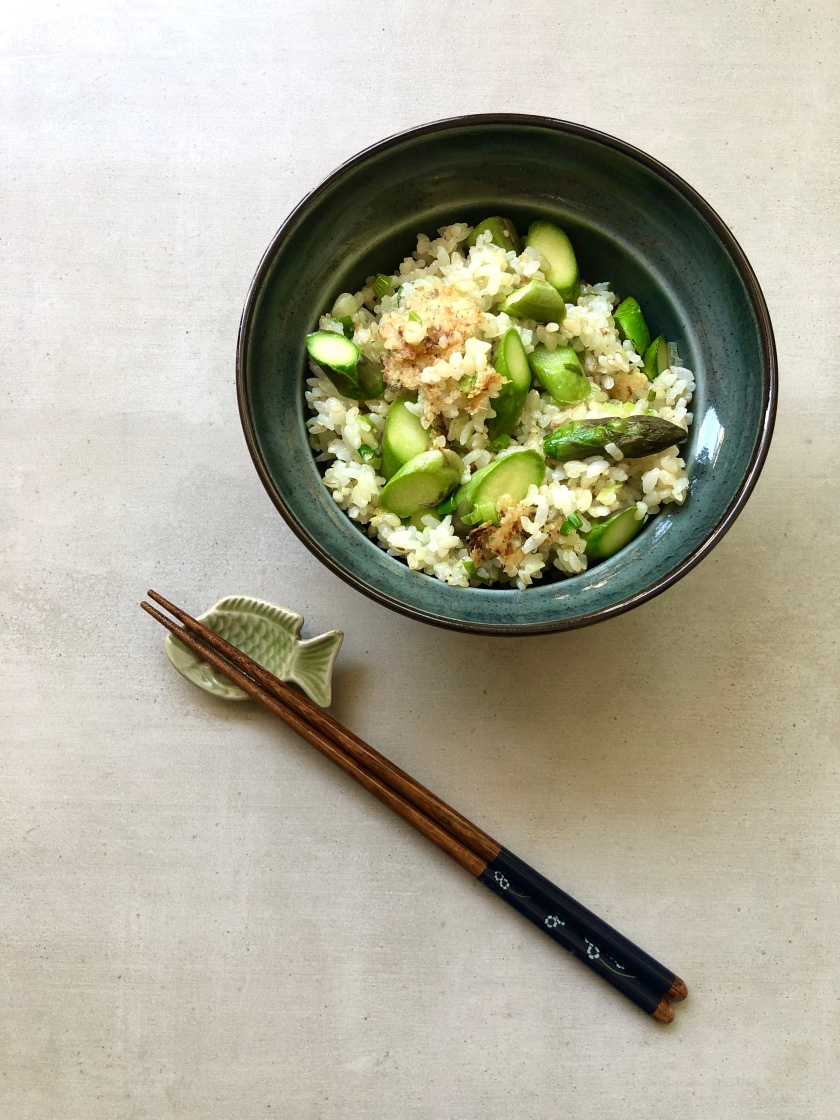
It’s certainly been a while! How have you all been? My family and I travelled to France at the end of June for two weeks and after we came back to Berlin, I still felt like I needed a little bit more time to settle into our new way of life, so I took another three weeks off, hardly any activity on social media either. I am feeling great after this long break and am immensely grateful that we could get out of our apartment after being ‘home-bounded’ for many months, a change of scenery surely helped us eliminated some of the anxiety and uncertainty that were built up in the past few months. We feel a lot better than a month ago and we certainly have found a new rhythm for our everyday life. Although our lives will still be affected by Coronavirus for some times to come, but we are learning everyday to better adapt to this unfortunate situation, hopefully to restore some sort of normalities. That said, our lives will never be the same again, but what about making the best out of this situation instead of complaining about it? I have been asking myself so many questions with regards to the current situation, not only about Corona, but also the matters which are happening around the world right now. It’s a constant struggle for me to find the right answer (or is there?). I will keep on trying, but until then I will do what I love most, cooking and sharing recipe here, and perhaps one day, when I decided what to do with this space going forwards, it might become an entirely different platform for me to make sense of the world.

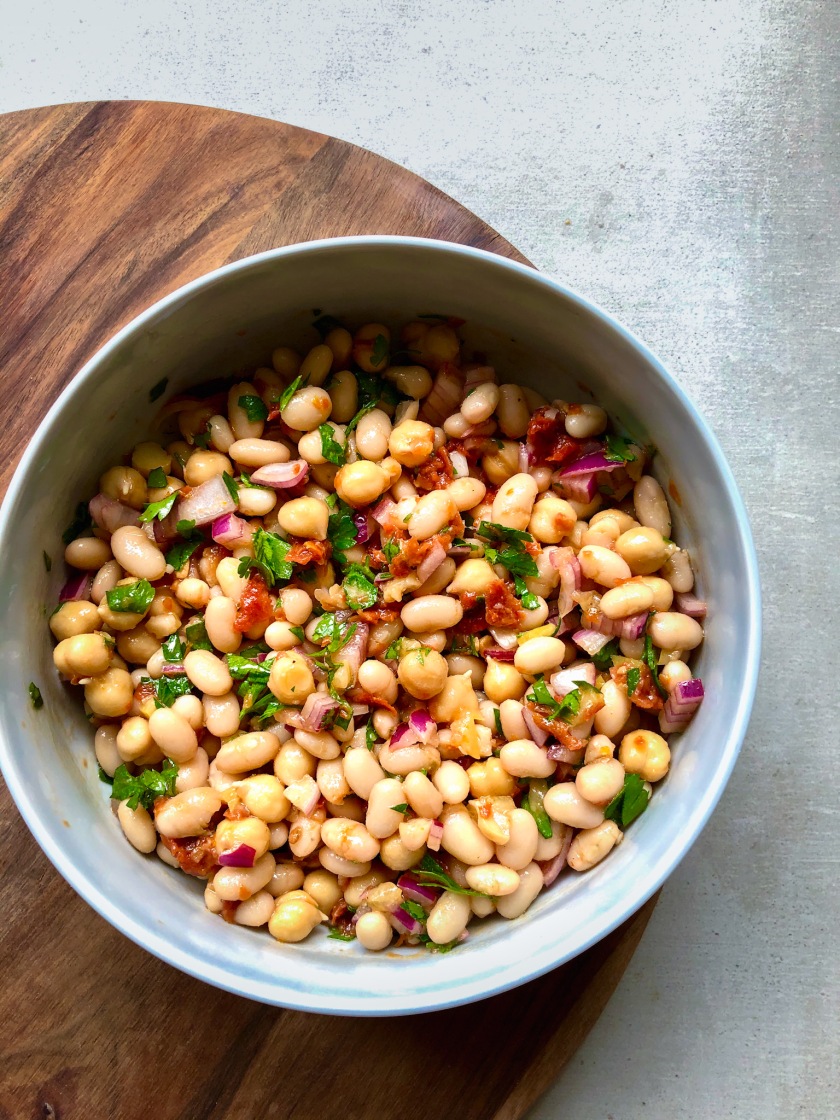
So coming back to the recipe I like to share this week: I called it ‘Holiday White Beans Salad’ because I learned the recipe from our family friends during our holiday in France, it became one of my favourite salads since, and it will always remind me of our holiday! It has all the wonderful flavours and texture one wants for a salad: smoky, tangy, umami, refreshing and it is extremely forgiven, it tastes great as a side salad or use it as a base and add whatever you like to make it a more substantial meal – for example: add chickpeas for a little bit more texture and protein (like I did here); add cherry tomato, cucumber and feta cheese to give it more crunch as well as creaminess; I will totally add rice if I crave for a more filling meal. Whatever you add, it will be delicious and I am confident it will become your ‘staple’ recipe if not your ‘favourite’! I hope you will give this salad a try. As always, would love to know what you think, drop me a line below in the comment section or tag me on Instagram!

Until next time,

Lydia x


Notes:

**I strongly recommend you to make this salad ahead of time, a few hours at best or at least 2 hours before serving to allow the flavour to develop.

white bean salad recipe


Ingredients:

serves 3 as a side

For the salad:

  • 1 can (400g) of cooked white beans, drained and rinsed
  • 100g cooked chickpeas (can in fine)
  • 1 small red onion, finely diced
  • A handful of fresh parsley, leaves picked and finely chopped.
  • 1 tsp. of persevered lemon (about 1/2 wedge), minced

For the dressing:

  • 2-3 pieces of sun-dried tomato (in oil), finely minced (about 1 tbsp.) (or just use ready made pesto)
  • 2 tbsp. red wine vinegar + 1/2 tsp.
  • 3 tbsp. good quality extra virgin olive oil
  • A pinch of salt
  • A couple of twists of freshly ground black pepper
  • 1/4 tsp. smoked paprika
  • 1/2 tsp. runny honey (agave syrup if vegan)
  • 2 tsp. lemon juice, separated

In a small bowl, combine chopped onion, 1/2 tsp. red wine vinegar and 1 tsp. of lemon juice and a pinch of salt. Let it marinate for at least 10 minutes. Set aside while you are making the dressing and the rest.

In another bowl or a glass jar, combine the rest of the dressing ingredients, stir well and have a good taste, adjust seasoning if needed.

Combine all salad ingredients in a medium mixing bowl, including the marinated red onion (juice and all), then add dressing and mix it thoroughly, have a taste again and adjust seasoning if needed. When you are happy with the taste, put the salad in the fridge for a few hours, or at least two to achieve a deeper flavour.

When ready to serve, drizzle a little bit of olive oil and a squeeze of lemon juice to refresh the salad again. Have a final taste and serve immediately.

holiday white bean salad recipe

the white bean salad we had in France

omelette with runner beans recipe

Easy Omelette with Runner Beans

Runner bean is one of the many wonderful vegetables we can enjoy during the summer months. The fresh and young runner beans are delightful to eat, sweet, juicy and take very little time to cook. It is a great summer produce to add to salad, pasta or even curry. And of course, it is delicious in an omelette too! Hence today’s recipe! It is so easy to make, it takes only 10 minutes of your time and you will have a plate of healthy velvety omelette to devour!

Choose the smaller beans that look pale green and supple. Avoid those bigger stalks that look dry and pale yellow, they are stringy and tasteless. Since runner bean is in its best form only in the summer months, we should enjoy it as much as we can while it lasts!

I hope you like this recipe and if you make it, please share and tag me on Instagram or leave a comment below, as always I would love to hear from you!

Love,

Lydia

Ps. We are leaving for France later this week for three weeks, so I won’t be able to post any recipes during our holiday. But if I got a chance to write something up, I will share it here, otherwise, see you in three weeks!

Note:

*I have a trick to remove the stringy bit from the runner beans: run the vegetable peeler from one end to the other on both sides of the bean to peel off the stingy bits. Then cut the bean in half, slivered in an angle. Since the beans are cut into fine slivers, they only require very little time to cook.


Ingredients:

serves 1

  • 3 medium free range eggs
  • 100g runner beans, silvered*
  • 2 stalk spring onions, finely sliced
  • Salt and pepper
  • 1 tsp. Tamari
  • 1 tsp. sesame oil
  • A small pinch of coconut sugar
  • Toasted sesame seeds (prefer mix of black and white)(optional)
  • Shichimi Togarashi (for garnish)(optional)
  • Vegetable oil

Serving suggestions:

  • Green salad.
  • Topped with parmasan and a side of tomato salad
  • Or I like it with rice and kimchi 😉


Beat the eggs in a bowl and season with salt and pepper. Set aside.

Warm a glug of vegetable oil in a non stick pan on medium heat. Add half of the sliced spring onion in the oil and let it sizzle for 30 seconds, followed by the runner beans. Sauté the vegetable for a minute. Add the sesame oil then the tamari and coconut sugar. Fry for another minute and then transfer the veggies in a bowl.

Return the pan to the stove and add another teaspoon of vegetable oil. Pour in the beaten eggs and just gently move the edge of the egg towards the centre with a spatula, let some of the liquid egg run to the edge and set. When there is only small amount of liquid egg left on the omelette, add the runner beans. Carefully fold the omelette into half moon shape. Let it cook undisturbed for another 30 seconds. Remove from heat.

Transfer the omelette to a serving plate and scatter the rest of the spring onion on top, then toasted sesame seeds and Togarashi if use. Serve immediately with one of the serving suggestions if you like, or just devour it as is.

omelette with runner beans recipe

gluten free sweet potato gnocchi recipe

Gluten Free Sweet Potato Gnocchi

Please excuse my absence in the last two weeks, I have been doing a lot of thinking, reading and reflecting about what has been happening in the world, the pandemic, the racism, the inequality in our society as a whole. What we need to do to make the changes that we desperately need. For me as a person of colour living in a white society, being a target of racism is inevitable, and it has been (at time) a difficult learning curve. I have grown used to the fact that there is this constant subtlety of racism around me, and so sad that I became used to it after more than two decades of living in the white predominated society. However, my unpleasant experiences can hardly be compared with our black sister’s and brother’s. I can’t even start to fathom how it is like for the black community all over the world to live their lives under constant threats of discrimination. Having said that, I am aware that, the majority of white people are kind and anti-racist and are aware of the existence of systematic racism which put people of colour, especially blacks in a vulnerable situation; and they too will do what they can to speak out and support the necessary change, as we can all see from the worldwide protests on the news everyday, and some changes are already happening. For me, after seeing so many people fighting for their right, demanding changes, I feel like I can no longer ‘used to’ the ‘normality’, I need to be more informed, listen and to share what I learn. We need to education our children: no matter what colour we are, we are equal, we deserve respect, we deserve to live our lives without threats. I have shared book/literature recommendations on my Instagram and will continue to do so whenever I can, so if you would like to know more, you know where to join me.

After a week off social media last week (because of the above reason), I am now ready to return to this space to share what I am always here to share, food content and recipes. I am also getting back into writing (essay and short story) which I am really pleased about. I am honour to be invited by The Wild Word magazine to contribute a piece of essay for their next issue (I will definitely let you know when it goes online!), therefore I have been spending a lot of time on writing the piece, which means I haven’t managed to create my own new recipe for you. The recipe I am sharing here today – Gluten Free Sweet Potato Gnocchi is from one of my favourite blogs: Heartbeet Kitchen I made this recipe numerous times and love it so much that I decided to reach out to Amanda, to ask for her permission to share it here. I am very happy that she gave me the ‘OK’! I have to tell you though, these gnocchis are highly addictive, so don’t say I didn’t warn you!

Please head over to Amanda’s blog for this delicious recipe (link here)! Only 5 ingredients, vegan and gluten free! Heavenly!

gluten free sweet potato gnocchi recipe

Vegetarian Singapore Noodles recipe

Vegetarian Singapore Noodles with BBQ Mushroom

If you are familiar with Chinese food and you might have already heard of (or even had) a noodle dish called Singapore noodles. Despite the name, it is not of Singapore origin. In fact, it is a very popular Cantonese dish created by Chinese cook! It has a very different taste than most of the usual Chinese noodles, because its main seasoning is curry powder! Traditionally, Singapore noodles is made with very thin rice noodles, barbecue pork, prawns, onions and bean sprouts. Stir-fried in a hot wok until every strand of noodle is coated with the warm spice and the noodles has a wonderful slightly springy texture. The main seasoning is curry powder and soy sauce, some add chili to achieve extra heat. It is one of the most famous dishes in Cantonese cuisine, every cook has his or her own version of this noodle dish, and I have my own version too – I use the ingredients I have in hands to create a vegetarian version which I am sharing here with you. The noodles I use in this recipe is also a little different than the usual type as I couldn’t get hold on to the thin one (my local small Asian shop doesn’t have the Chinese rice noodle, I can only find the Thai ones which is slightly thicker). And instead of barbecue pork, I make barbecue oyster mushroom! But you can of course stick with the traditional ingredients with pork and prawns, as I always say, take the inspiration and make a recipe that is your own! You will love the flavour anyway no matter what ingredients you use.

Notes:

Since I only have a electric stove and a small wok, I have to cook this noodle dish with my large cast iron casserole which won’t have the same effect as cooking with a metal wok on gas (fire) stove like the traditional way. Therefore, I season the ingredients separately during the course of cooking in order to ensure every ingredient is well seasoned and when everything comes together, it will taste as a delicious whole. And trust me, it is a good trick to learn when you have not got the appropriate equipment.

Ingredients:

Serves 4

  • 200g thin rice noodle
  • 4 Pak Choi (or other green), sliced
  • 1 small or 1/2 large red bell pepper, sliced
  • 1 onion, finely sliced
  • 1 stalk spring onion, finely sliced (for garnish)
  • 2 eggs, lightly beaten
  • salt and pepper
  • 1 jalapeño (or other chili) sliced (garnish, optional)

For the BBQ mushroom:

  • 250g oyster mushroom, hand-pulled into shreds
  • freshly ground pepper
  • vegetable oil for frying
  • 2 tbsp. BBQ sauce
  • a pinch of coconut sugar

For the noodle seasoning:

  • 3 tsp. curry powder (separated)
  • 1 tsp. Turmeric
  • 2 tsp. fine grain sea salt
  • Vegetable oil
  • 2 tbsp. +1 tsp. tamari (or soy sauce)
  • 1 tbsp. +1 tsp. mushroom stir-fry sauce (or oyster sauce)

Rehydrate rice noodles according to package instructions. Rinse and drain in colander. Transfer drained noodles on a large baking tray lined with baking parchment. spread in an even layer, let the noodles dry out a bit before season it with 2 tsp. of fine grain sea salt, 2 tsp. of curry powder, 1 tsp. of turmeric and 1 tbsp. of vegetable oil. Set aside.

Preheat oven to 200 degrees Celsius. While the noodle is soaking, sauté mushroom in a heated pan with 2 tbsp. vegetable oil. Fry until mushroom is slightly brown and moisture has evaporated. Transfer the mushroom to a baking dish, add the BBQ sauce, mix well and spread them out in one layer. Sprinkle with coconut sugar to get even more caramelisation. Bake in the oven for 10-15 minutes or until mushroom is slightly charred. Removed from oven and set aside.

To make the egg omelette: Pour beaten egg into a hot pan and tilt the pan until egg evenly coats the bottom of the pan. Let it cook and set into an omelette and transfer it to a chopping board. Chop the omelette into bite size pieces. Set aside.

Heat a tablespoon of vegetable oil in a wok or frying pan until really hot. Add onion, then Pak Choi and bell pepper, sauté for a minute. Add 1 tsp. of curry powder, 1 tsp. of tamari and 1 tsp. mushroom stir-fry sauce. Sauté for another minute. Add noodles, mushroom, egg, tbsp. of tamari and 1 tbsp. mushroom sauce. Fry and mix until everything is well combined. Have a taste, add more seasoning if needed.

Divide noodles into warm bowl and scatter chopped spring onions and jalapaño if used. Serve immediately!

Vegetarian Singapore Noodles recipe

Miso Congee with Tarami Shiitake Jammy Egg, spicy sesame spring onion recipe

Miso Congee with Tamari marinated Shiitake Mushroom, Jammy Egg and Spicy Sesame Spring Onions

One of my many favourite dishes I grew up with is congee – also known as ‘rice porridge’, rice first marinated in salt and oil to allow the rice to break down quicker and easier to absorb flavours, then cooked in water or broth with other ingredients such as meat, seafood, dried mushroom and lots of different pickles vegetables to boost the umami flavour, cooked until it is velvety and pillowy (somewhere between porridge and soup). My mother used to serve congee with two types of fried noodles on the side, some people love to add fried bread sticks, pickled eggs and nuts to add texture. But congee can be eaten as a full meal as it is, depends on what ingredients you put in it, like the recipe I am sharing with you here, with just a few simple toppings, you have a bowl of flavourful, warm-your-heart-and-belly goodness to enjoy. It is the ultimate comfort food of my childhood, even now, I crave for it from time to time, especially when I feel like something kind to my tummy and flavour that reminds me of home.

By the way, this is not a traditional recipe for congee, but I am using the principal of its cooking method and the ingredients that are available to me here in Germany. The wonderful combination of flavours I create here ticks all the boxes in terms of flavour, texture and satisfaction. So if you like it and make it, I would love to hear from you! Leave a comment here or tag me on Instagram!

Take care and until next time!

Notes:

* Jasmine rice will be the best rice to use for congee, but since I don’t have any at home, I use sushi rice, and it is just as good. Any short grain rice should work too.

** I use only water as I have the dried scallop to add umami flavour, but you can use dashi stock as an alternative. The amount of water stated here is a guideline, since different rice performs differently so you might need to add more broth or water to achieve the texture you like. I like the final dish quite thick, but if you prefer a thinner texture, add more stock or water if needed. Please note that there is another 250ml (1 cup) of liquid from rehydrating the scallops, so if you are not using scallop, then you will need 7 cups of water or broth altogether.

***if you have dried shiitake mushroom, you can use a mix of dry and fresh for the topping if you like.

Miso Congee with Tarami Shiitake Jammy Egg, spicy sesame spring onion recipe

Ingredients:

serves 4

For the congee

  • 1 cup Jasmine rice or short grain rice*, rinsed and drained
  • 6 cups of water or dashi stock (about 1.5L) plus more if needed**
  • 4-5 small dried scallops, rinsed (optional)
  • Salt
  • 1 tsp. neutral taste vegetable oil
  • 1.5 heaped tbsp. miso paste (I use red miso)
  • toasted sesame seeds for garnish (optional)
  • 2 free range eggs (for serving)

For the Tamari Shiitake:

  • 200g fresh Shiitake mushroom, brush cleaned and sliced***
  • 2 tbsp. tamari (or regular soy sauce)
  • 2 tbsp. Mirin
  • 1 tsp. agave syrup (or brown sugar or maple syrup)
  • 1/2 tsp. rice vinegar
  • Vegetable oil
  • A small knob of butter
  • Freshly ground black pepper

For the spicy sesame spring onions:

  • 3-4 stalks of spring onions, finely sliced
  • 1/2 tbsp. sesame oil
  • 1/2 tsp. of chili flakes (I use Togarashi), plus more if desire

To prepare the congee, in a medium bowl, combine rice, oil and salt and let it marinate for 30 minutes.

Meanwhile, rehydrate the dried scallops by submerging them in 1 cup (250ml) of just boiled water. Set aside.

Make the tamari marinade: combine tamari, mirin, syrup and rice vinegar in a small bowl, mix well and set aside.

When the 30 minutes is up, add rice in a medium large sauce pan, then pour in 1.5L of water plus the rehydrated scallops and its soaking water. Bring everything to boil and then turn down the heat to medium low, let it simmer for 30 minutes, stir occasionally to prevent scorching. It will get thicker after 15 minutes so it is a good time to give it a good stir. After the 30 minutes, the rice should become very soft and porridge like.

When you are happy with the texture, remove from heat, stir in the miso paste until fully combine. Have a taste, season with salt or add a bit more miso paste. It shouldn’t be overly salty as the toppings and the marinade will give a final seasoning to the whole dish.

Make the spicy sesame spring onion by combining all ingredients in a small bowl, set aside.

Make the jammy eggs: place eggs in a pot of cold water and bring to a boil, if the eggs are large, boil them for 5 minutes and immediately submerge them in cold water, shell and cut in half just before serving. Half of the egg for each person.

While the congee is cooking, make the tamari shiitake. Heat 1.5 tablespoon of vegetable oil in a frying pan, add the mushroom and sauté for a few minutes or until the mushroom is cooked through and turns slightly char, add the butter if use. Remove from heat and drizzle 2 tablespoons of the marinade on top, mix well and set aside. Keep the rest of the marinade for serving.

To assemble: ladle the congee in warm bowls and then top it with shiitake, jammy egg, sesame spring onion, toasted sesame seeds (if use) and finally, spoon over the remaining marinate to each bowl, and serve immediately.Miso Congee with Tarami Shiitake Jammy Egg, spicy sesame spring onion recipe

creamy mushroom and asparagus with wild rice recipe

Creamy Mushrooms and Asparagus served with Wild Rice

It is not difficult at all to make mushroom taste delicious or even addictive, one needs to get to know the difference between each kind, and to learn the right way to cook with them. Some mushrooms have more moisture than the others, which makes it preform better in a sauce, such as cremini, button and shiitake. King oyster is my favourite, it has a sturdier (meaty) texture than other mushroom, so apart from cooking them in a stew or sauce, it can also be simply pan-fried, grilled with salt and pepper or deep-fried in batter/panko, or shredded and baked in the oven to mimic pulled pork; all of these method produce absolutely delicious results (for example this recipe). Once you master all the different ways of cooking mushroom, you will understand why a bowl of luscious mushroom is hard to resist.

Since mushroom and cream are the best of friends, and creamy sauce and rice is a heavenly combination, hence today’s recipe! Apart from serving this velvety sauce on rice, I can highly recommend to serve it with pan-seared salmon (see picture at the end of the post), or oven baked veggies to make it a more substantial meal.

Notes:

* I use asparagus here because it is in season, but you can also use other green instead such as kale, chard, or more spinach.

** I always have a jar of sun-dried tomato paste ready in the fridge (recipe here), to use it on sandwiches, sauce, salad dressing, stew, etc. So it is worth to spend extra time to make it. It keeps well in the fridge. But you can just use chopped sun-dried tomato from the jar if you are short on time, or you can even use shop bought sun-dried tomato paste as well.

*** If you don’t have ready made veggie stock, here is a a quick short cut – stock powder, for this recipe, I add 1/2 cup water and 1/2 tsp. veggie powder directly into the pan, stir and that’s it. You can also adjust seasoning by adding more stock powder if needed.

****This dish can be made vegan by using plant based cream instead.

Ingredients:

serves 2-3

  • 300g mixed mushrooms (I use cremini, king oyster and fresh shiitake mushroom), rinsed, pat-dried and cut into bite size pieces
  • 5-6 green asparagus, snap off woody end and cut into 6-7cm long*
  • 2 large handfuls of baby spinach
  • 1 small red onion, finely chopped
  • 3 tbsp. olive oil, separated
  • 1/2 tsp. smoked paprika
  • 1/2 tsp. dried onion powder (optional)
  • 1 clove of garlic, minced
  • 1 small pinch of dried chili flakes (optional)
  • 2 heaped tbsp. sun-dried tomatoes **
  • 1/4 cup white wine
  • 1/2 cup veggie stock***
  • 1/2 cup heavy cream****
  • Salt and pepper
  • 1 tsp. cornstarch (optional)
  • 2 tsp. water (optional)

To serve:

  • cooked basmati and wild rice

Combine cornstarch and water to make a slurry, set aside.

Warm 2 tablespoons of olive oil in a frying pan. Sauté onions with a pinch of salt on medium heat for 2 minutes or until the onion is slightly translucent. Add smoked paprika and dried onion (if use), stir until everything is well combined and the oil is infused with the smoke paprika.

Add mushrooms, garlic and another tablespoon of olive oil, give a few turns of freshly ground black pepper and a pinch of chili flaks (if use), then fry for about 2 minutes. Pour in the wine to deglaze the pan. Let it sizzle and when the wine has almost evaporated, add sun-dried tomato paste. Continue to sauté until everything is well combined. Add asparagus and pour in the stock and the cream. Stir everything well and let it simmer (not boil otherwise cream will separate) for a couple of minutes. Have a taste, adjust seasoning if needed. When you are happy with the taste, add the cornstarch slurry to thicken the sauce (you can always skip this step if you prefer a runnier sauce).

Add the baby spinach now and stir everything well together until the spinach is wilted. Remove from heat. Serve it immediately with basmati and wild rice.

creamy mushroom and asparagus with wild rice recipe

example of other serving suggestion : with pan seared salmon.

creamy mushroom and asparagus with salmon

Chinese Style Noodles with Tangy Chili Oil Dressing recipe

Rice Noodles with Amazing Tangy Chili Oil Dressing

This tangy chili oil dressing is highly addictive and it can be served with various other dishes, such as salad, on rice, on crispy tofu, fish or meat, or even as a dumpling dipping sauce (highly recommended). The tangy taste comes from Chinkiang vinegar aka Chinese black vinegar, which is made of fermented glutinous rice, wheat barn, water, salt and sugar; its distinctive flavour is a combination of smoky, umami, slightly sweet and pungent which makes it one of the most popular condiments in southern Chinese cuisine, every household has one bottle in the kitchen. Compares to other Chinese white or rice vinegar, it certainly gives a little more complexity to the overall taste. For this amazing noodle dressing, I combine black vinegar with my favourite spring onion oil, a chili crisps oil (from the Asian market), plus a few other essential seasonings in good measure, and the result is out of this world, spicy(!), umami and tangy all in one mouthful! This combo makes this dressing an absolute flavour bomb! I am totally hooked! I am confident that you will love it too! If you make it then don’t forget to tag me on Instagram or leave a comment below, would love to see your creation!

Stay safe and happy cooking!

Notes:

1. I recommend to make the dressing at least 30 minutes in advance so the flavour will deepen, but if you are short on time, it will still be delicious straight after mixing it.

2. If you want to use the dressing for other aforementioned dishes, leave out the veggie broth for a more concentrated taste.

3. I can handle very small amount of gluten, for example those present in readymade sauces etc. But if you are intolerant to gluten, use rice vinegar instead and omit the dark soy sauce (or find one that is gluten free).

4. You can use other noodles as desired, I love flat rice noodle therefore I use it here, but thin rice noodles, wheat noodles or even spaghetti will work well here.

5. If you are into meat, you can replace the mushroom tofu combo with any minced meat, chicken, pork or beef will work great here.

Chinese Style Noodles with Tangy Chili Oil Dressing recipe

Ingredients:

serves 2 (very hungry tummies) or 3

For the toppings: (makes more than 2 servings)

  • 100g smoked tofu (my favourite one is from Taifun)
  • 4-5 chestnut mushroom (95g)
  • 1 tsp. mushroom sauce (I use LeeKamkei) (optional but recommended)
  • 2 tsp. tamari (or regular soy sauce)
  • 1 tsp. mirin
  • 1/2 tsp. sesame oil
  • 1/2 tsp. Sambal Oelek (or other chili sauce)
  • oil for frying

For the Tangy Chili Oil Dressing:

  • 3 tbsp. neutral oil (I use Rasp seed oil)
  • 3 tbsp. chopped spring onion (about 2-3 stalks, white and pale green parts only)(you can keep the dark green part for garnish)
  • 1.5 tbsp. Chili oil (best with chili bits, I use LaoGanMa), more if you want to really spicy
  • 1 tbsp. Chinkiang Vinegar (aka Chinese black vinegar)
  • 2 tbsp. Tamari
  • 1 tsp. dark soy sauce (for colour)
  • 1 tsp. sesame oil
  • 1/2 cup veggie broth

For everything else:

  • 250g dried rice noodles
  • 1-2 Pak choi (or other leafy green), halved then quartered
  • sesame oil
  • a pinch of salt

To prepare the dressing, heat the oil in a small sauce pan and when hot, very carefully add in the chopped spring onion, let it sizzle for a minute and remove from heat (we don’t want them to burn though), add the rest of the ingredients, mix well and set aside. It is best to make this 30 minutes before serving.

To prepare the mushroom tofu topping: in a food processor, finely chopped mushroom. Transfer them to a bowl. Rinse and dry the bowl of the processor and add smoked tofu, process until finely chopped (but not mashed). Set aside.

In a small bowl, combine tamari, mirin, sugar, sesame oil and Sambal Oelek, set aside.

In a non-stick pan, heat a tablespoon of oil and sauté the mushroom until most of the moisture is evaporated. Then add smoked tofu. Sauté for another minute until everything is well combine and takes on a light charred brown colour. Add the sauce and mix well. Have a taste, season if needed. Transfer the topping to a bowl, keep warm and set aside.

Cook the noodle as per package instructions. While the noodle is cooking, put the Pak Choi in a deep rim dish, and cover them with boiling water, leave for 2 minutes, drain, add a small pinch of salt and drizzle a little bit of sesame oil, keep warm and set aside.

When the noodles are cooked, drain them in a colander. Then return the noodle back into the pot. Add the prepared dressing (leave about 1/4 cup behind) while the noodles are still warm. Mix gently but thoroughly. Leave it for a minute to allow the noodles to absorb the dressing.

Divide the noodles into two warm bowls, topped with the mushroom tofu toppings and quick blanched Pak Choi. Spoon over the remaining dressing all over. Just before serving, mix the topping and the noodles together and dig in immediately (see picture below)!

Chinese Style Noodles with Tangy Chili Oil Dressing recipe

asparagus fried rice with crispy ginger recipe

The Simplest Fried Rice with Asparagus and Crispy Ginger

This recipe is literally the simplest one that I have on the blog, in fact, I am wondering if I should even call it a recipe, because it is one of those dishes that you just make it without even needing to plan it in advance. It is the beauty of this dish, and for me it is quite a special dish as it reminds me of my mother, she used to make ginger fried rice often when we were kids, so this is truly a dish that transports me back to my childhood, and its flavour is as beautiful as my memories are.

If you are familiar with my approach to cooking with recipe, (in most of my recipes) ingredient can be replaced with similar ones or whatever you have in hand which may fit, don’t stress about if you don’t have it or you can’t get it right at that moment, nothing should stop you being creative and to try out the recipe that appeals to you. Since it is asparagus season so it just makes sense to me that I make this recipe with asparagus, but if you don’t have or don’t like asparagus, you can totally substitute it with any vegetables you have. The two important ingredients here which create the main flavour of this dish are ginger and spring onion, I gather most of you will have ginger already, spring onion can also be omitted but highly recommended. The crispy ginger and spring onion give the dish a wonderful texture and most importantly- flavour, and the heat from the ginger grows on you slowly and steadily in a peculiar way, so if you love ginger like I do, this is the dish for you! If you made this dish, please don’t forget to tag me on Instagram or leave a comment below, would love to hear from you!

Have a wonderful weekend and stay safe!

Notes:

1. As I mentioned earlier, you can substitute asparagus with any vegetable you like, ginger and spring onion are the most important flavour enhancer of this dish, since sea salt is the only ‘seasoning’ in this recipe, so try to include them both. I love using flaky sea salt as the larger flakes stay intact which give a thrilling surprise when you bite into it. But it is totally fine if you only have fine grain sea salt.

2. Quantity of the ingredients listed below is just a guideline, if you prefer less heat, then use less ginger stated. I reckon 2 cups of rice per person is the perfect amount but you can always adjust it more or less as you wish.

3. As always, I recommend leftover rice for any fried rice dishes, but if you don’t have any pre-cooked rice, it is totally fine to use freshly cooked rice, the best will be cooked the rice at least an hour before and let it cool down slightly before frying.

Ingredients:

serves 2

  • 4 cups of cooked rice (I use a mix of brown and white rice)
  • 4-5 stalks of green asparagus, snap of the woody ends, then cut into bite size pieces
  • 2-3 stalks of spring onion (green and white part), finely chopped
  • 1.5 -2 tbsp of fresh ginger, finely chopped
  • 1 large pinch of flaky sea salt, plus more to taste
  • 1 tbsp. sesame seeds
  • Vegetable oil for frying

Heat 1 tablespoon of oil in a frying pan, when the oil is simmering, turn the heat down to medium high, add the ginger and spring onions. Let them sizzle for 1 minute (you don’t want the veggies to burnt) until fragrant and the ginger slightly takes on a lovely golden brown colour.

Add the asparagus and fry for another minute. Add cooked rice, turn the heat up to high again, fry until rice and veggies are evenly incorporated, add a teaspoon of oil if it appears to be a bit dry. It is ok to have some slightly burnt rice as it will give the dish lovely smoky flavour and crunchy texture.

Add the flaky sea salt and fry for another 2 minutes. Have a taste, adjust seasoning as needed. When you are happy with the taste, remove from heat and divide it into two warm bowls. Serves immediately.

asparagus fried rice with crispy ginger recipe

Courgette and Halloumi Waffles recipe

Courgette Halloumi Waffles

I always make sure I have Halloumi in the fridge, grilled or pan-fried brings out the best flavour of this cheese; I love its curious squeaky texture and its beautiful golden brown colour when fried, that’s why it is my favourite cheese of all time! And it makes a wonderful meat substitute for those who wants to cut down on their meat consumption. Apart from frying them as it is, I love to grate them and add them into a mixture of grated vegetable, egg and chickpea flour to make fritters or pancakes (it is a dish that is on our weekly meal plan rotation). My favourite veggie mix are courgette and potato, I used to fry the mixture like fritters, but since I was given a waffle maker last Christmas, plus it does make the cooking process a lot easier, I have been making them as waffles ever since! But you can definitely just fry them in a frying pan like pancakes or fritters, it will be just as tasty!

Notes:

1. I like these waffles less ‘battery’ with more veggies than flour, but if you want yours more like ‘waffles’ then add another one or two tablespoon of chickpea flour, and add some Greek yogurt to the mixture, a tablespoon at a time until you achieve the desired consistency. Adjust seasoning if needed.

2. We always serve them with tzatziki, but the day when I did this photoshoot, I didn’t have any yogurt, so I decided to serve it with tapenade, it was actually a really great combo too.

3. Turmeric is entirely optional, but I like that it gives the waffles a nice golden hue.

Ingredients:

makes 10-12 waffles

  • 2 medium courgette, trim out both ends
  • 450g waxy potato, peeled
  • 1 medium carrot
  • 1 block (250g) halloumi cheese
  • 1 tsp. sea salt
  • 3 tbsp. chickpea flour
  • 2 medium eggs, lightly beaten
  • 1 tsp. baking powder
  • 1/2 tsp. ground turmeric (optional)
  • Freshly ground black pepper
To Serve:

Tzatziki (not picture)

  • 1 cup (250ml) Greek yogurt (or other yogurt of choice)
  • 1/2 cucumber, deseeded, grated and drained
  • 1 tbsp. lemon juice (plus more if desire)
  • A pinch of sea salt

Other suggestions:

  • red pepper tapenade (recipe here or shop bought) (pictured)
  • sweet chilli sauce

In a food processor (you can use box grater with the largest holes side) grate courgette, carrot and potatoes and then transfer them to a colander. Sprinkle 1 teaspoon of sea salt to the mix and then toss them lightly with your hands. Place the colander on a plate to catch the excess liquid, let it sit for 30 minutes.

Rinse and dry the bowl of the food processor and then grate the halloumi, transfer it to a bowl and set aside.

Meanwhile, make the tzatziki (or red pepper tapenade) by mixing all ingredients in a bowl, taste and season it to your liking. Keep it in the fridge while you are making the waffles.

Prepare a large mixing bowl and lay out a clean tea towel on the kitchen counter. Take a large handful of courgette, carrot and potato mixture, squeeze out as much liquid as possible with both hands then transfer them to the tea towel, after 3 handfuls of hand-squeezed mixture, gather the edges of the tea towel then twist and squeeze as much liquid out one more time. Then transfer the content in the tea towel to the large mixing bowl. Repeat the procedure until all veggie mix is in the big mixing bowl.

Add Halloumi, chickpea flour, baking powder, turmeric (if use), black pepper and beaten egg into the bowl of veggies. Mix thoroughly. Let it rest for at least 15 minutes. The mixture won’t look like pancake batter, but it will work.

Preheat the oven to 120 degrees Celsius, place an oven-proof tray inside.

If use waffle maker, preheat it and when it is ready, add about 2 tablespoons worth of mixture onto each waffle iron. I cook my waffles for about 4-5 minutes in total, you can adjust the cooking time according to your waffle maker instructions.

Transfer the cooked waffles onto the oven tray in the oven to keep them warm while you are finishing the rest of the veggie mix.

Once all waffles are cooked, serve immediately with tzatziki or tapenade.

Courgette and Halloumi Waffles recipe

Simple Baked Beans Recipe

Simple Braised Cannellini Beans with Preserved Lemon

How are you all doing this week? We are fine and well on our side and hope you are too. This week, I would like to share a simple and versatile recipe with you – Simple Braised Cannellini Beans with Preserved Lemon. It is piquant, smoky, velvety and absolutely addictive! I have been making this weekly and we haven’t got tired of it at all, in fact, my daughter asks me regularly if we have some of these delicious ‘baked beans’ in the fridge, so she can top her toasts with it in the mornings! It really is one of the best protein rich dishes you will ever want to have regularly in your fridge. Please don’t be discouraged if you don’t have any preserved lemon, and don’t let it stop you making this, you can simply substitute it with freshly grated lemon zest, its taste won’t be as piquant, but it will still be delicious! I have written down several serving suggestions for this dish in the ‘Notes’ section below, so take your pick or create your very own ones! If you made it, please tag me on Instagram or leave a comment below, I would love to hear from you!

Here let’s cheer to another healthy week, stay safe!

Notes:

1. If you can’t find Cannellini beans, any white beans will work just as well. I imagine black beans or even kidney beans would work too, or maybe even chickpeas!

2. I made my own preserved lemon, it is actually super easy to make, only 3 ingredients: Lemon, salt and olive oil (after that you will need to wait for 4 weeks before you can start eating it)! There are plenty of recipes online and they all seem to be very much the same, so if you have time, I highly recommend you make your own. It is one of the best ingredients to have in your pantry, seriously! You can add it to stew, salad dressing, use it as marinade for meat and root veggies, so so good. If you want to speed up the process, try to buy them in Middle Eastern shops, they should carry preserved lemon in jar.

3. Serving suggestions: I served these beans on toasted sourdough bread and pan-fried Halloumi cheese (for this blog post, see picture). You can also crack a few eggs on top of the beans and put it under the oven grill for a few minutes to make a Shakshuka style breakfast dish; serve it with pasta, creamy polenta or rice as a simple lunch with a green salad, as a side to grilled fish or steak for dinner (I once served it with cauliflower steak, so good!). I have to say, the list can go on and on… It is definitely one of the most versatile dishes you can make, cook a big batch for the week for convenience, it keeps well in the fridge and in fact, it tastes even better the day after!

Simple Baked Beans Recipe

Ingredients:

serves 4

  • 1 can (400g) white beans (I use Cannellini), drained
  • 1 can (400g) whole tomatoes (or chopped)
  • 1 small red onion (or yellow onion, or shallot), finely chopped
  • 1 tsp. smoked paprika
  • 1/2 tsp. dried onion
  • 1/4 tsp. garlic powder
  • 1/2 tsp. dried thyme
  • 175ml water
  • a few shakes Worcester sauce
  • 1 tsp. tomato puree
  • 1 pinch of coconut sugar (or regular brown sugar)
  • 1 tbsp. preserved lemon (or freshly grated zest of 1 lemon), finely chopped
  • Salt and pepper to taste
  • Olive oil

Warm a tablespoon of olive oil in a cast iron or non-stick pan, add chopped onions and a pinch of salt, sauté about a minute. Add smoked paprika, dried onion and garlic powder to the onions and continue to sauté for another 2 minutes or until onions are soft and turned translucent. Add the can tomato and use the spatula to break down the tomato. Add tomato paste, thyme, water, the Worcester sauce and preserved lemon (or lemon zest). Bring everything to a boil and turn down the heat to medium low and let it simmer uncovered for 15 minutes.

Have a taste and adjust seasoning if needed. Add the can of Cannellini beans and mix well. Simmer the beans uncovered for another 10 minutes. The sauce will become silky and rich. Add a couple of turns of black pepper and have a final taste. If you use lemon zest, add a squeeze of lemon juice just before serving to give a tangy touch to the final dish.

Serve immediately.

Simple Baked Beans Recipe